
Will a Storage Bench Fit Under Your Staircase? Measuring Nook Depth, Headroom, and Clearance
Every square foot in a modern home counts, yet the awkward triangle of dead space beneath a staircase is often left neglected. Transforming this architectural void into a functional hub with under stair storage can instantly declutter an entryway, mudroom, or hallway. However, before you invest in a gorgeous pre-built unit or custom-carpentry, you must answer one crucial question: Will furniture actually fit comfortably in this unique architectural footprint?
Fitting a stair nook bench requires far more than merely checking floor space width. Because staircases slope downward, you have to account for varying ceiling heights, slanted wall angles, protruding trim, and the swing or pull path of doors and drawers. Whether you are trying to maximize a tiny townhouse entry or organize a sprawling family home, mastering the nuances of storage bench under stairs clearance guarantees that your design dreams translate seamlessly into everyday reality.
In this comprehensive measurement and layout guide, we will walk you through exact formulas, step-by-step sizing procedures, common design mistakes, and practical solutions for tricky layouts. By the time you finish reading, you will possess all the expert knowledge needed to measure your space like a seasoned professional.

Decoding the Architecture: Why Under-Stair Spaces Are Uniquely Challenging
Before pulling out your tape measure, it helps to understand the anatomy of a staircase. Stairs are constructed with a specific rise and run, creating a diagonal underside—known as the stringer or soffit—that slopes continuously toward the floor. This means any furniture placed underneath is subjected to a shrinking vertical boundary.
Furthermore, standard furniture is rectangular, whereas under-stair nooks are trapezoidal or triangular. When planning your staircase clearance, you are forced to design within a restricted polygon. If your bench is too deep, your head will hit the sloping ceiling when you sit down. If it is too tall at the back, it won't slide far enough into the nook. Understanding these spatial limitations prevents costly returns, damaged drywall, and frustrating layout failures.
Phase 1: Essential Tools for Accurate Measurement
Accurate numbers require proper instruments. Do not rely on guesswork or flexible cloth tailoring tapes when planning small space furniture under stairwell installations. Gather the following toolkit before starting:
- A 25-foot steel tape measure: Rigid enough to span across empty floor space without bending.
- A digital laser measure: Invaluable for capturing long spans, diagonal ceiling slopes, and high floor-to-ceiling apexes without needing a second person.
- A digital angle finder or level: To measure the exact pitch of your staircase stringer.
- Painter’s tape: For marking out the proposed footprint of the bench directly on your floor and wall.
- A notepad and pencil: Or a dedicated home planning app to sketch out your rough dimensions.
Step-by-Step Measurement Guide: How to Measure Under Stair Storage Space
To ensure a foolproof fit, follow this sequential 4-step measuring framework. Take every measurement twice to eliminate human error, and always record dimensions in inches for the highest level of precision.
Step 1: Measuring Width and Floor Footprint
Width is usually the most straightforward dimension, but staircases often feature decorative baseboards, thick stringer trims, or uneven plaster walls that subtly narrow the available gap.
- Measure the usable width between the interior walls or baseboards at the front opening of the nook.
- Measure the width further back, near the point where the stairs meet the floor. Never assume walls are perfectly parallel; old and settling homes frequently have tapering widths.
- Subtract at least 1/2 inch to 1 inch of clearance on each side if you are sliding a pre-built bench into an alcove, ensuring the unit won't scrape your paint during installation.
Step 2: Assessing Nook Depth and Usable Floor Reach
Under stair nook depth and width measurements dictate whether your bench will sit flush or jut out awkwardly into your walking path. Because the ceiling slopes down, you cannot use the entire floor depth of the staircase base.
- Measure from the front opening wall straight back along the floor until you hit the point where the sloping ceiling drops below your minimum acceptable height.
- Keep in mind: if you plan to sit on the bench, your body needs enough overhead space to lean back and stand up without bumping your head.
- Check if there are floor vents, heating grates, or baseboard moldings that might obstruct the back legs of the bench.
Step 3: Calculating Headroom for Stair Furniture
One of the most frequent grievances homeowners face is bumping their heads when standing up from an under-stair seat. Measuring headroom for stair furniture requires careful vertical evaluation.
- Measure the vertical height from the floor to the underside of the stairs at the front edge of where your bench will sit.
- Measure the vertical height at the back edge (where the backrest or wall meets the seat).
- Standard dining and entryway bench heights range between 17 and 19 inches from the floor. Ensure that at the exact point your head rests when sitting, the ceiling clearance is at least 36 to 48 inches to prevent a claustrophobic user experience.
Step 4: Measuring Slanted Wall Space Under Stairs
If you are planning a built in stair bench dimension guide for custom carpentry, mapping the diagonal slope is essential. The angle of the stairs determines how high a backrest you can install and whether wall art or hooks can be mounted above the bench.
- Measure the vertical height at the highest point of the opening and the vertical height where the stairs meet the floor.
- Note the horizontal distance between these two points. This forms your right triangle.
- Share these three dimensions with your furniture maker or use them to select a modular shelving and seating kit that mimics the exact pitch of your staircase stringer.

Evaluating Drawer Pull-Out Clearance Under Stairs
Many homeowners choose an entryway storage bench under open stairs that features pull-out drawers, rolling bins, or hinged flip-top lids to maximize organizational capacity. However, adding moving parts introduces new spatial variables.
- Drawer Slide Clearance: If your bench features heavy-duty pull-out drawers on tracks, measure the available hallway clearance in front of the stairs. A standard 20-inch deep drawer requires its full depth plus enough body clearance to crouch down and pull it open. If your hallway is narrow, consider side-access cabinets or lift-up top seating instead.
- Hinged Lid Clearance: If the bench lid flips upward like a chest, ensure the raised lid does not collide with the underside of the stairs or low-hanging stair treads. Calculate the arc of the lid's open position before purchasing.
- Shoe and Basket Accessibility: If you are planning measuring clearance for under stair cubbies, verify that shoes, boots, and storage bins can slide in and out freely without catching on carpet fibers, uneven transitions, or trim work.
Special Considerations for Different Staircase Types
Not all staircases are built alike. Your architectural style dictates how you approach your project:
Open-Riser Staircases
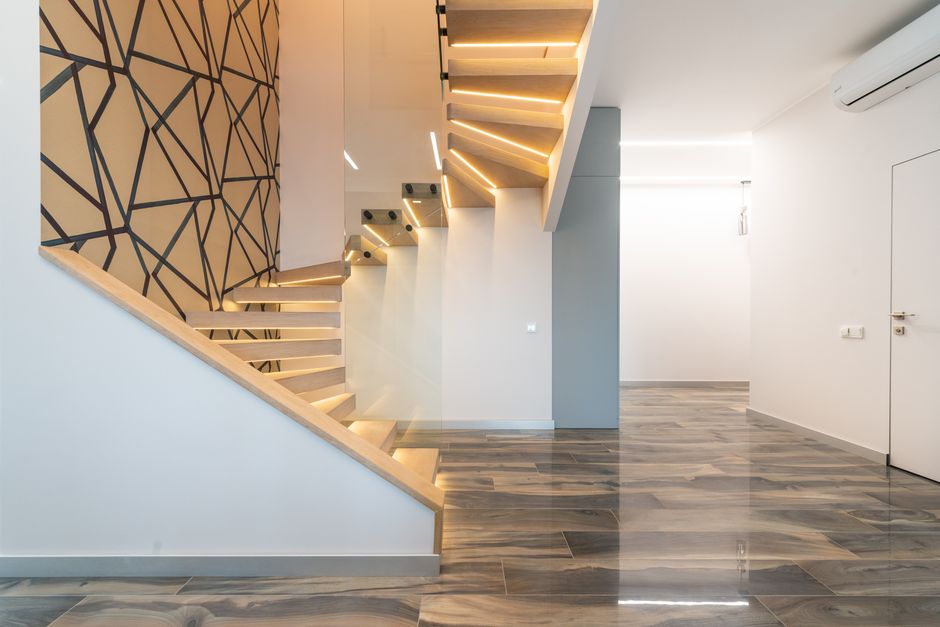
Open-riser stairs allow light to filter through, making under-stair spaces feel larger and more ventilated. When placing a bench here, you have more flexibility with headroom because light and air circulate freely. However, keep in mind that dust, debris, or small items dropped from the stairs above might land on the bench or stored items below.
Closed-Riser Staircases
Closed-riser stairs create a solid, solid-roofed alcove. This provides excellent shelter against falling dust, but it can feel dark and cave-like. When planning furniture here, consider integrating battery-operated or hardwired LED puck lights into the underside of the stairs to illuminate the bench seating area.
Basement Stairs
If you are evaluating will furniture fit under basement stairs, be prepared for utility obstructions. Basement stairwells frequently house electrical panels, sump pump discharge pipes, HVAC ductwork, or water shut-off valves. Always inspect the nook for hidden utility access before sliding any heavy storage bench into place.

Common Mistakes to Avoid When Fitting a Storage Bench Under Stairs
Even meticulous planners can fall into common spatial traps. Protect your project by steering clear of these frequent pitfalls:
- Ignoring Baseboard and Trim Thickness: Forgetting to measure wall-to-wall dimensions at the narrowest point of the trim often results in a bench that gets hopelessly stuck halfway into the alcove.
- Neglecting Body Ergonomics: Buying a deep bench just to fill empty space without checking whether an adult can comfortably sit upright without slouching to avoid the ceiling.
- Blocking Traffic Flow: Placing a bulky storage bench that protrudes past the natural boundary of the stair stringer, creating a toe-stubbing hazard in high-traffic hallways.
- Forgetting Flooring Transitions: Measuring height from bare subfloors, only to realize that adding thick hardwood flooring, tile, or an entryway rug reduces your vertical clearance by half an inch.
- Overlooking Outlet Access: Blocking electrical wall outlets or heating vents with a permanent built-in unit, which can violate building codes or disrupt your home's climate control.
Step-by-Step Action Plan: From Measurement to Installation
To summarize your workflow, use this actionable timeline to guide your under-stair storage transformation from concept to completion:
- Clear and Clean: Remove all stored items, dust, and debris from the under-stair alcove so you have a pristine surface to measure.
- Take Baseline Measurements: Record width, depth at floor level, and vertical height at both the front and back of the nook.
- Map with Painter's Tape: Outline the exact dimensions of your proposed bench on the floor and side walls. Live with the taped outline for 48 hours to evaluate hallway walking clearance.
- Test Movable Components: Simulate drawer pulls, cabinet door swings, and top-lid openings with cardboard mockups or measuring tape arcs.
- Shop or Build: Match your verified measurements against retail furniture specifications or hand them over to a professional cabinetmaker.
- Install with Care: Protect your walls and flooring during placement, securing any anti-tip brackets if required for safety.
Frequently Asked Questions
1. Can I buy a standard pre-built bench for under my stairs, or does it have to be custom-made?
You can certainly use a standard retail bench if your under-stair nook happens to match standard furniture dimensions (typically 48 inches wide by 18 inches deep). However, because staircases slope at custom angles, most homeowners find that custom-built cabinetry or modular cube storage units yield a much cleaner, gap-free fit.
2. How much headroom do I need above an under-stair bench?
Ideally, you want at least 36 to 48 inches of vertical headroom from the seat cushion to the underside of the stairs. This ensures an average adult can sit down, stand up, and shift positions comfortably without hitting their head on the sloping ceiling.
3. What is the best way to maximize storage in a shallow under-stair nook?
If your nook depth is less than 16 inches, traditional pull-out drawers may not fit well. Instead, opt for open shelving, shallow cubbies for shoes, vertical boot racks, wall-mounted coat hooks on the adjacent walls, or sliding vertical pull-out towers that utilize height rather than deep floor space.
4. How do I account for slanted walls when designing built-in seating?
Measure the exact pitch of your staircase stringer by recording the height at the front and back of the nook alongside the total horizontal run. Use these three data points to create a right-triangle template, which allows your carpenter to angle the backrest of the bench so it hugs the wall flush.
5. Can putting a storage bench under the stairs block fire safety exit routes?
In most residential homes, hallways and stairwells serve as primary egress routes in case of emergency. Ensure that your storage bench—especially when drawers or cabinet doors are fully open—does not narrow your exit pathway below local building code minimums (typically 36 inches of clear walking path).
6. What tools are best for measuring awkward diagonal spaces?
A digital laser measure is exceptionally useful for measuring diagonal slopes and tall apex heights under stairs without needing a helper. Paired with a sturdy steel tape measure and a digital angle finder, you can capture every irregular contour accurately.
Conclusion
Transforming the neglected dead space beneath your staircase into a functional, elegant storage hub is one of the most rewarding home improvement projects you can undertake. By carefully measuring nook depth, evaluating vertical headroom, planning for drawer and lid clearance, and avoiding common sizing mistakes, you can turn an awkward architectural void into a stunning design feature. Take your time with the measurements, map your layout with painter's tape, and enjoy the beautiful, clutter-free results!
💬 Comments & Questions
Post a Comment